SQL Server Management Studio (SSMS) is an integrated environment for managing SQL Server databases. It provides tools for configuring, monitoring, and administering SQL Server instances, whether they are on-premises or in the cloud. You can find the latest version of SSMS on the Microsoft website, here it is SSMS v20.
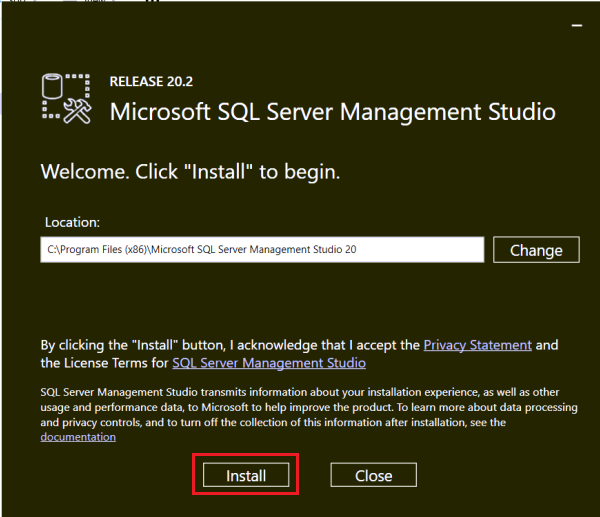
1. Execute the installer; you have the option to choose the root or installation directory, but it is advisable to keep it as the default. After that, click on Install.
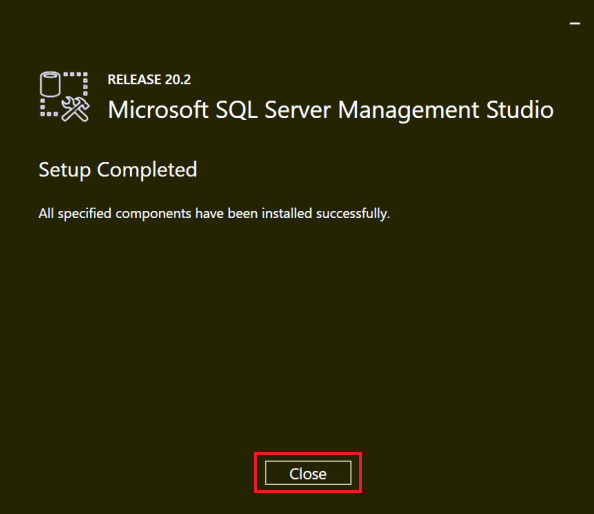
2. Once it's installed close the window.
3. Type SSMS or Microsoft SQL Server Management Studio into the Windows search bar and open it. Alternatively, search for it in the default path where it was installed. Usually C:\Program Files (x86)\Microsoft SQL Server Management Studio 20\Common7\IDE.
Check that the Server name is the correct one, by default it will sign up with Windows Authentication, please check Trust server certificate and click on Connect.

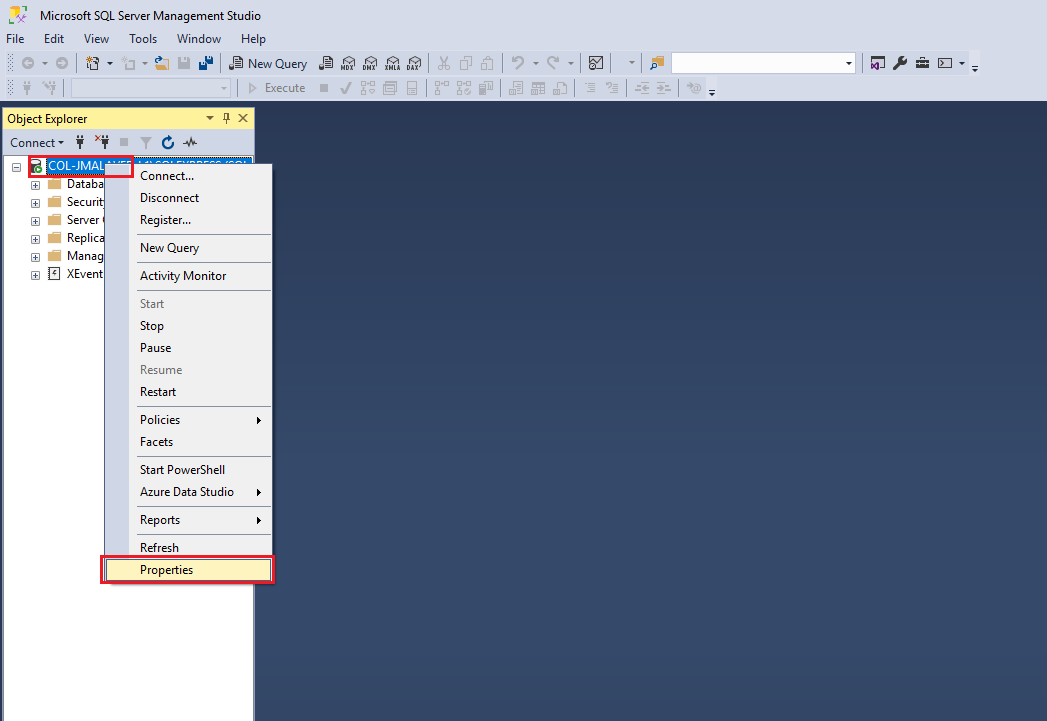
4. Once you are logged in, right click on your SQL server instance and click on Properties.
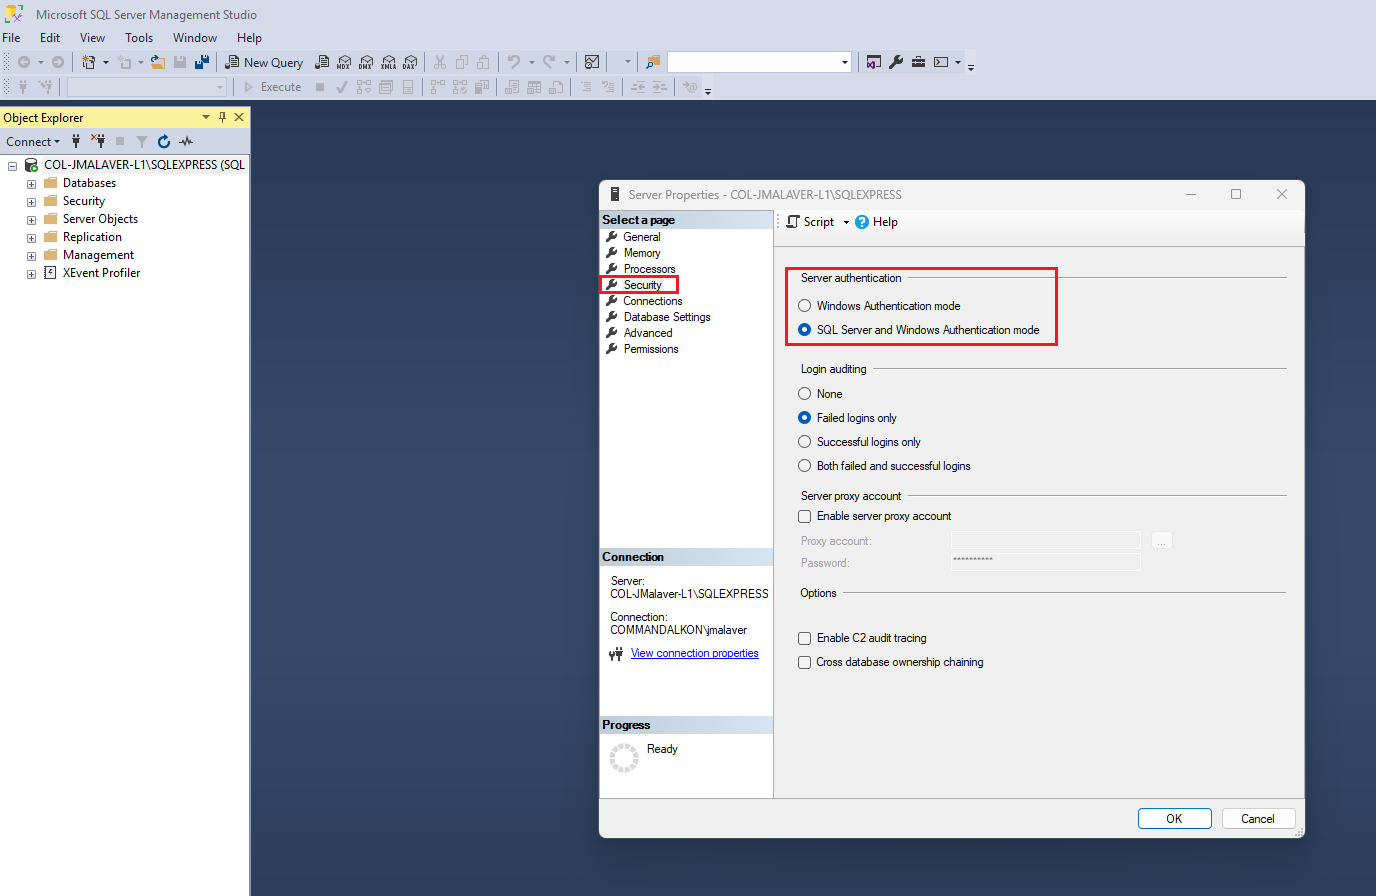
5. Go to Security and click on SQL Server and Windows Authentication mode. This will allow us to access to SQL using SSMS or any other application using a SQL user.
6. On the same window, go to Connection and make sure Allow remote connections to this server is checked.
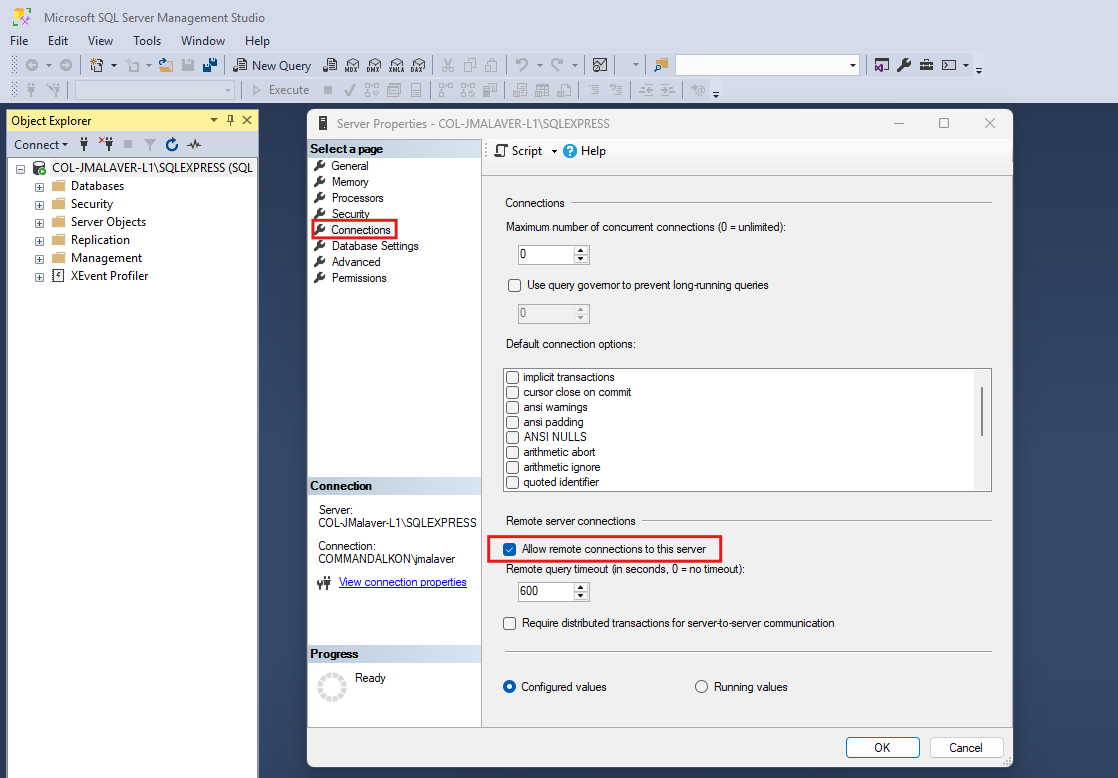
Finally, click on Ok button.